Bathroom: Episode VIII
Episode VII of our bathroom renovation project.
Details
The details are not the details – they make the design.
– Charles Eames
One of the challenges in our renovation project is finding the motivation for the last 20% of an initiative. This is particularly true when you know that there are a lot of bigger things on your to-do list that you could start working on. So finding the right balance between focusing too much on the details and leaving things in an unfinished state is delicate. Those challenges are probably quite universal and can be applied to other domains – at least I’m facing them daily in my work as a product manager as well. I’m trying to stay pragmatic and always focus on what has the biggest impact, but especially when you work on the space you also live in you actually need to take the time to finish stuff. At least in my experience, not doing it takes a big mental strain on yourself as you are constantly reminded of the little flaws and keep on thinking about how to solve them.
Inspiration
All of this reminds me a bit of the concept of “cognitive leaks” that I’ve first heard about in the context of UX design from Kathy Sierra back in 2014.
Martijn Doolaard, a Dutch designer and adventurer who is documenting the renovation of his two stone cabins in the Italian alps (I highly recommend to check out his channel) also addresses the topic in one of his videos.
tl;dr Stop starting, start finishing – sorry, this was a big introduction for a rather small piece of work 😅 Let’s get into it.
The Problem
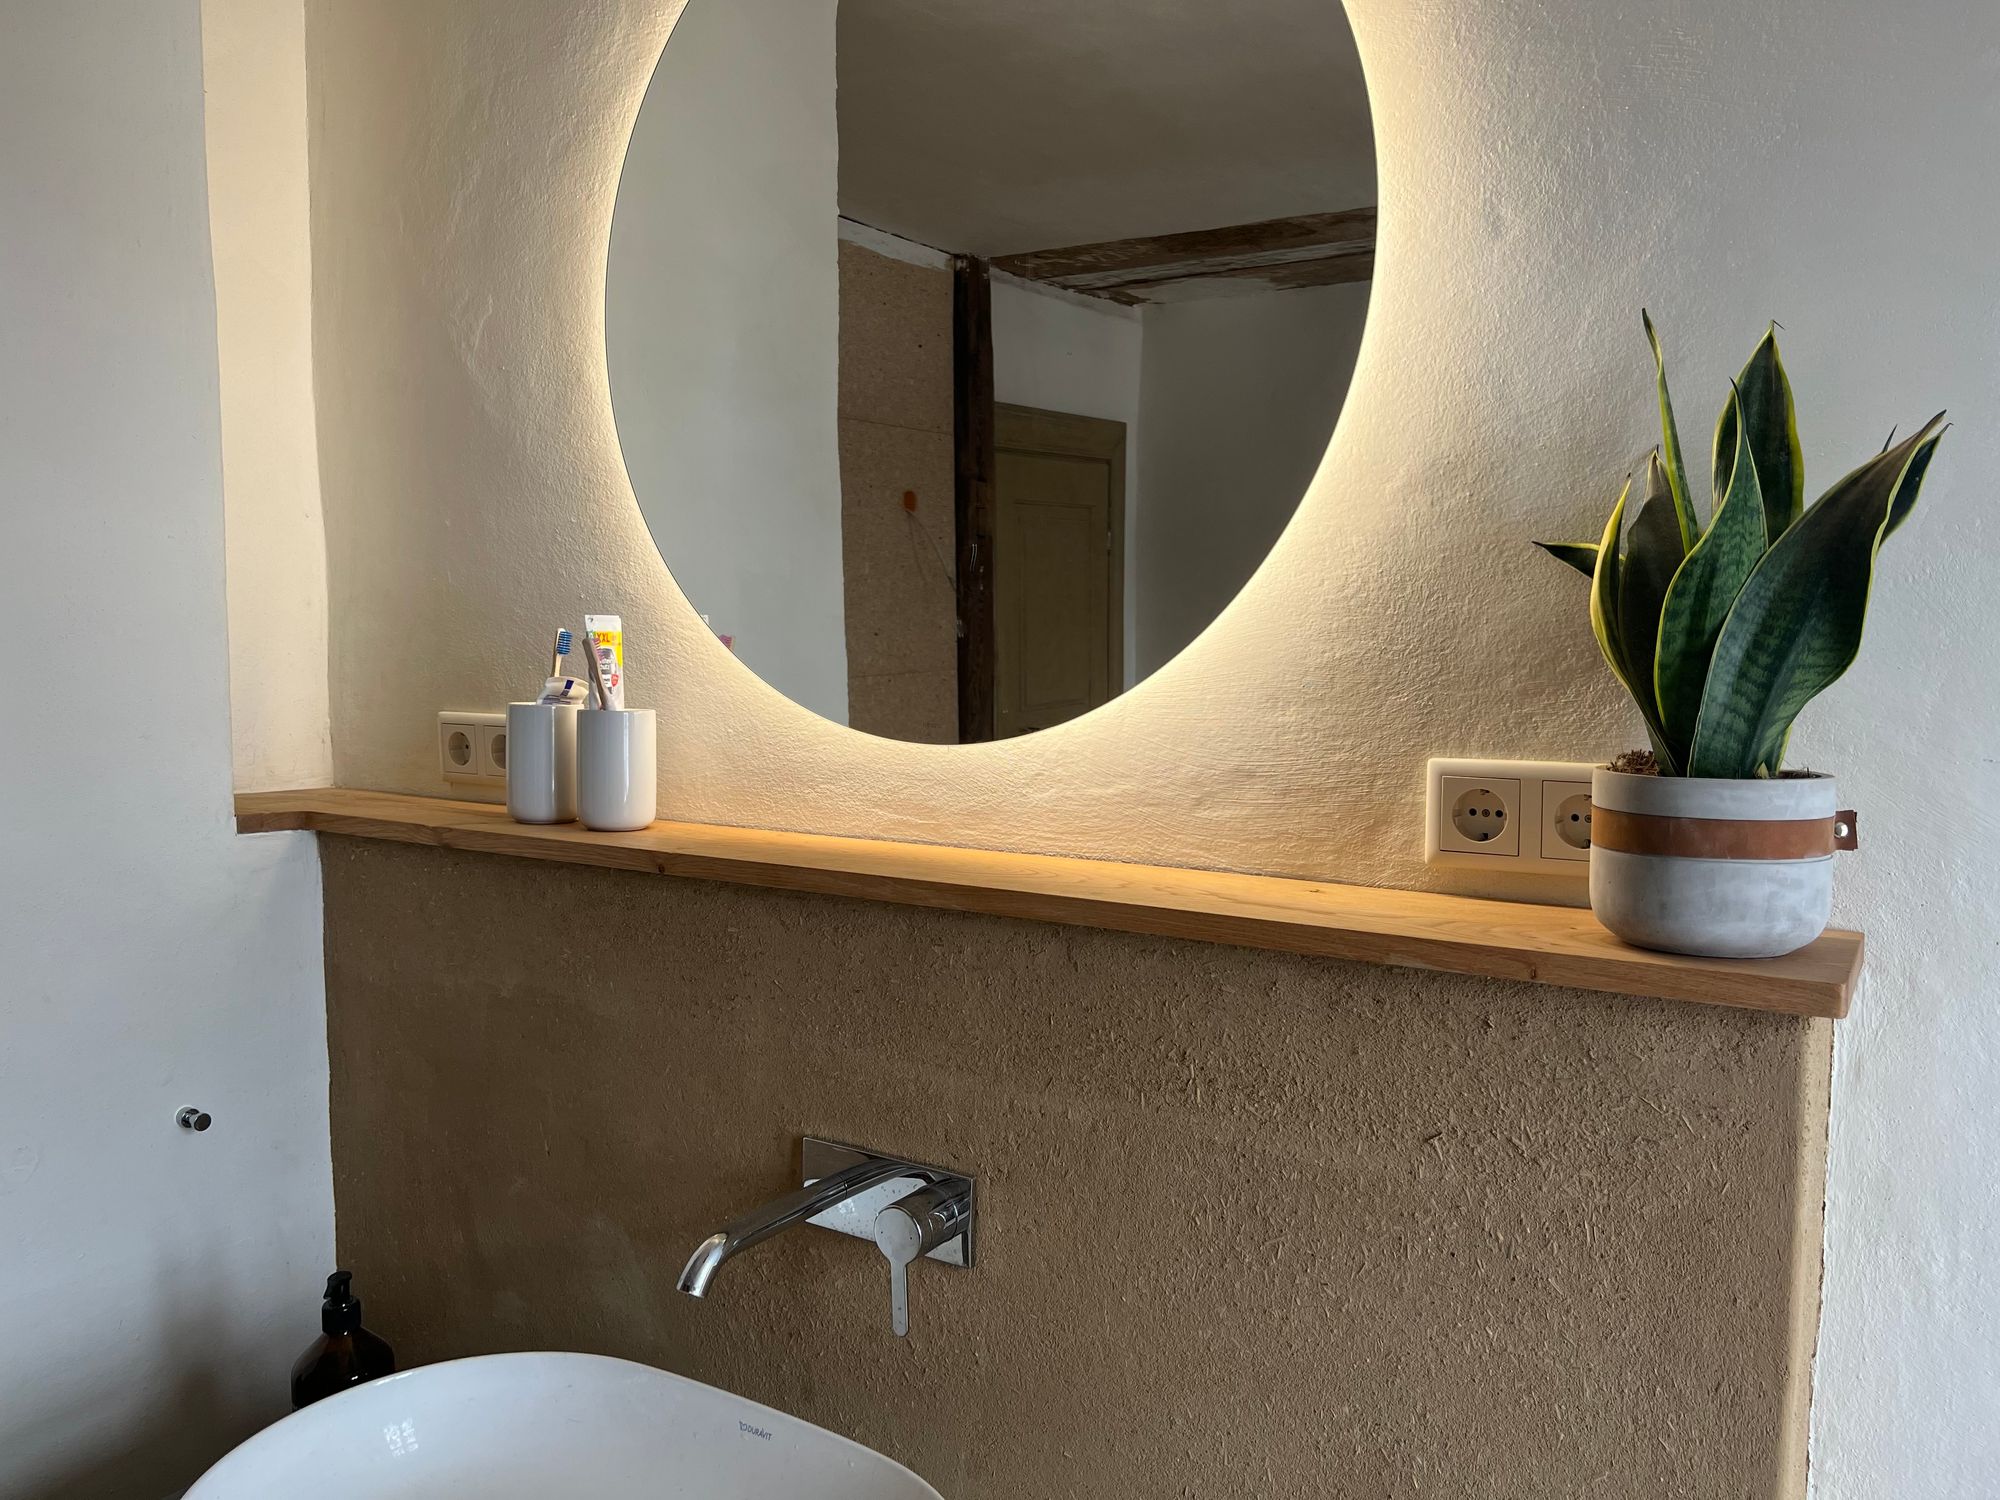
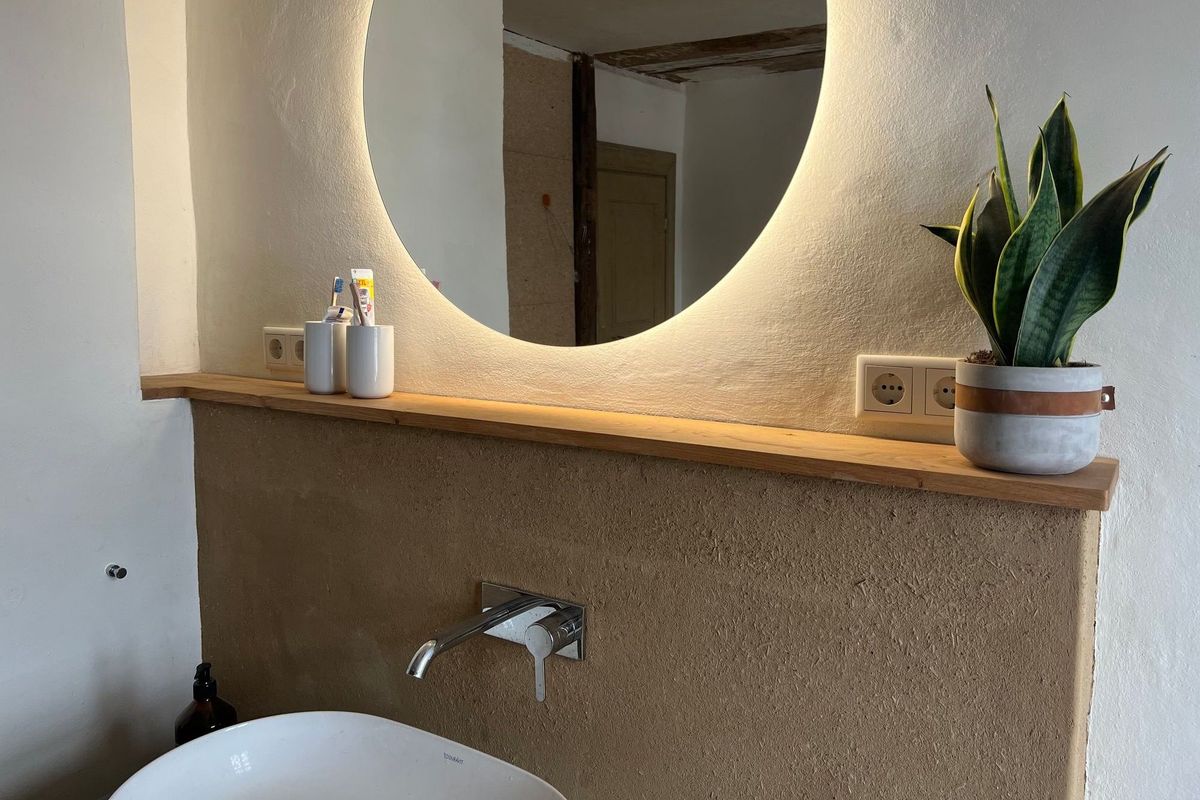
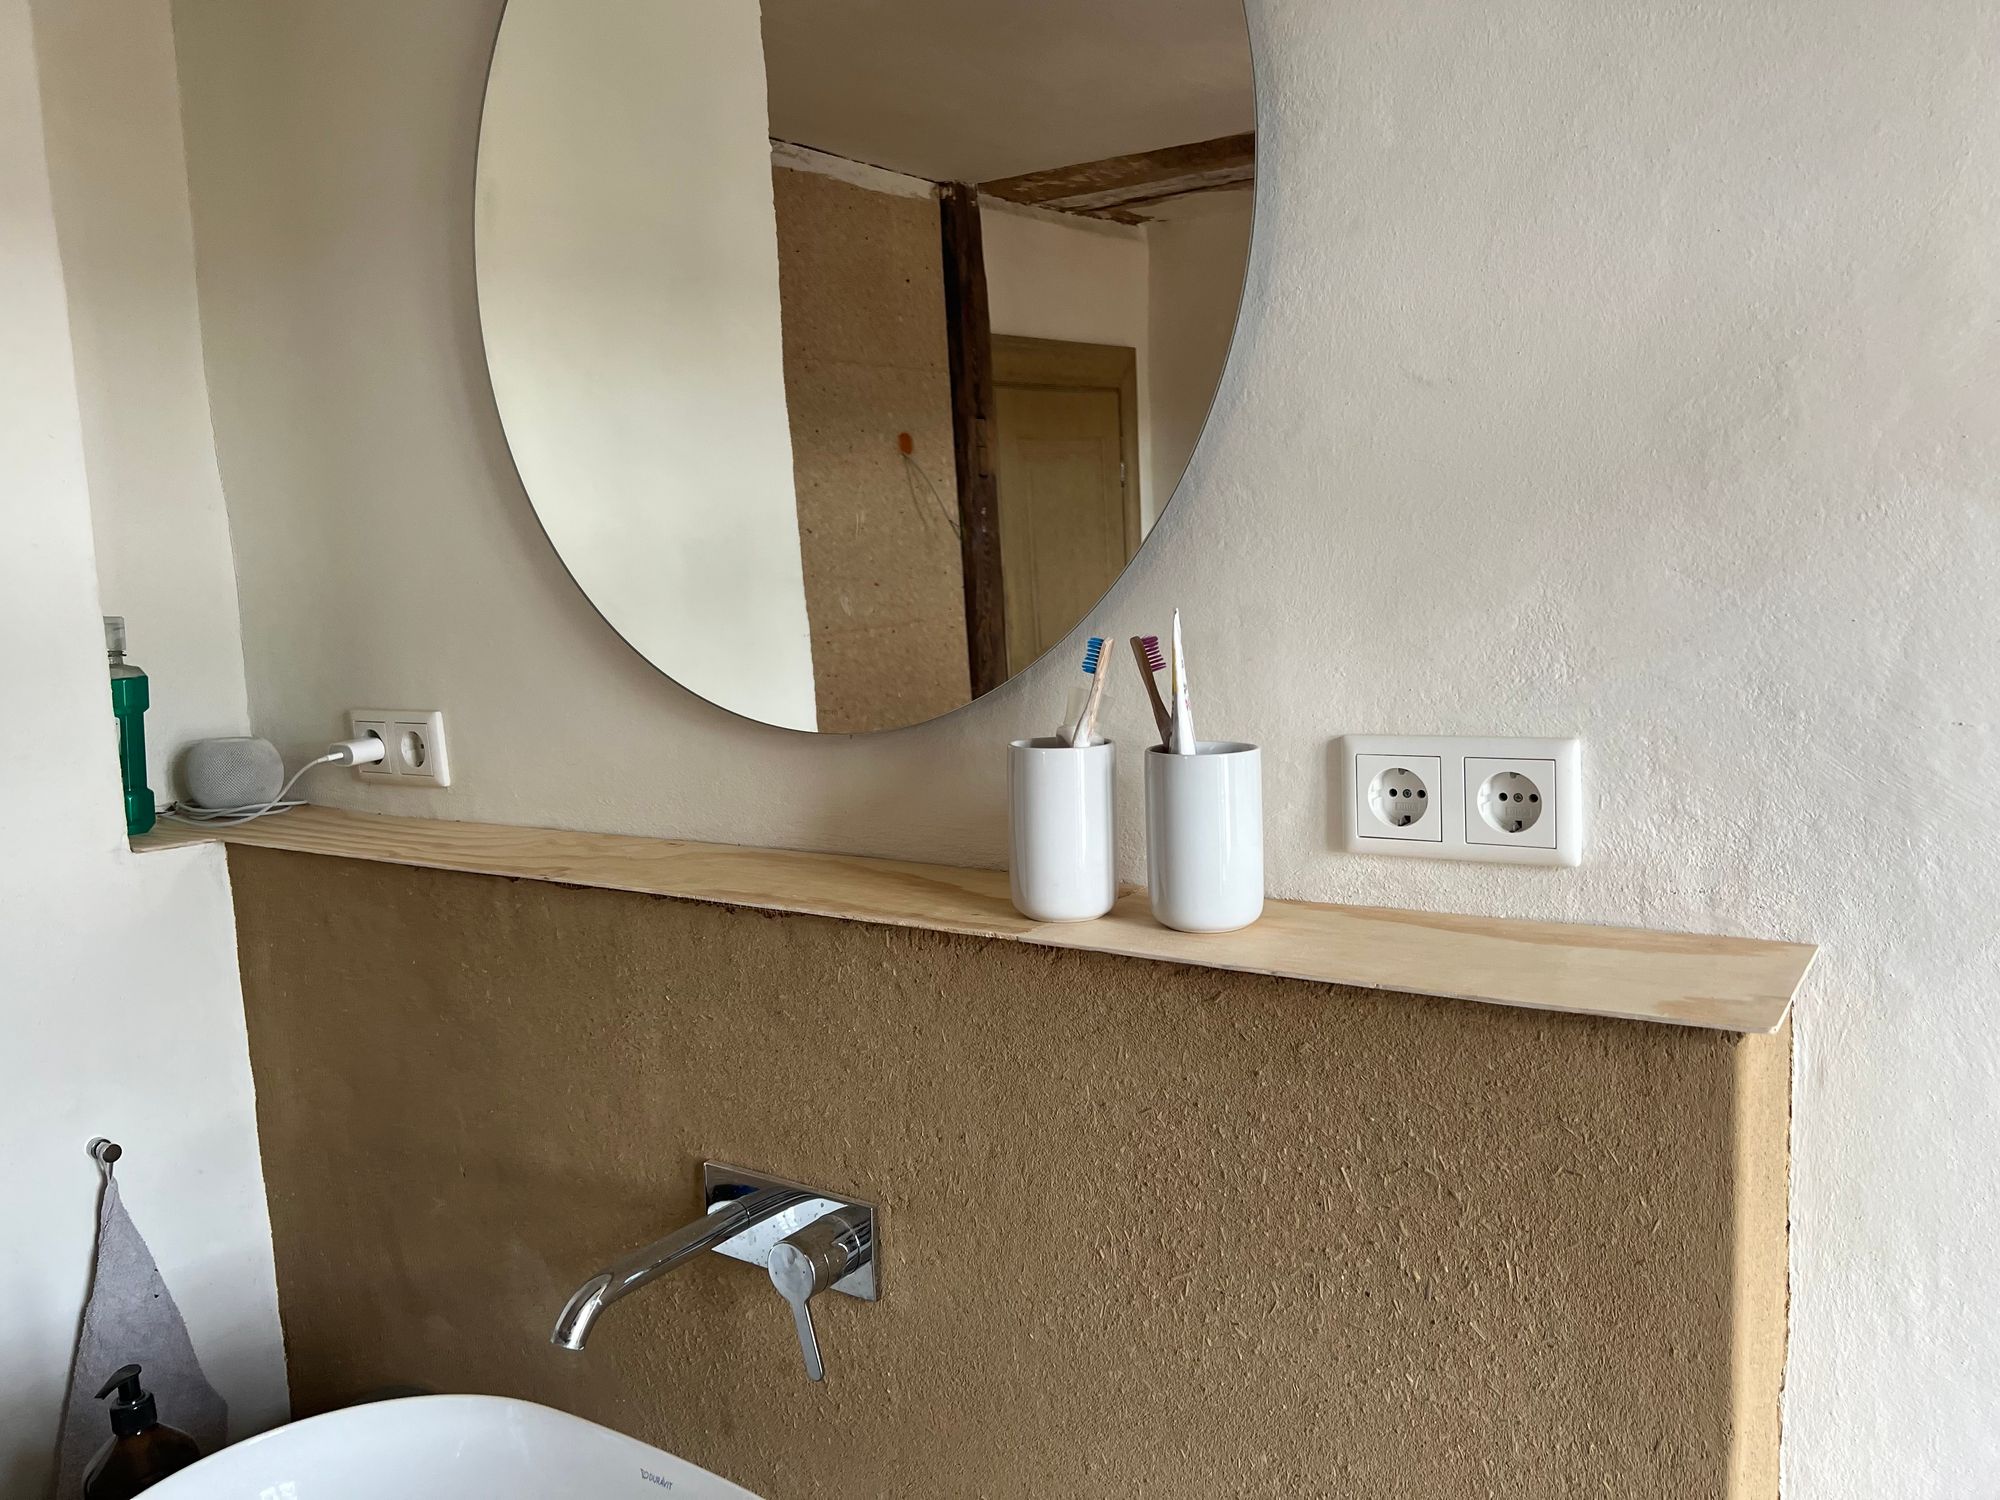
At the wash place in our bathroom we built a bit of front-wall installation to hide the plumbing and to use it as a shelf. We’ve used wood boards and clay to cover the underlying construction and always wanted to put a nice oak board on top of it. As always, things not being square and level make for another interesting puzzle challenge.
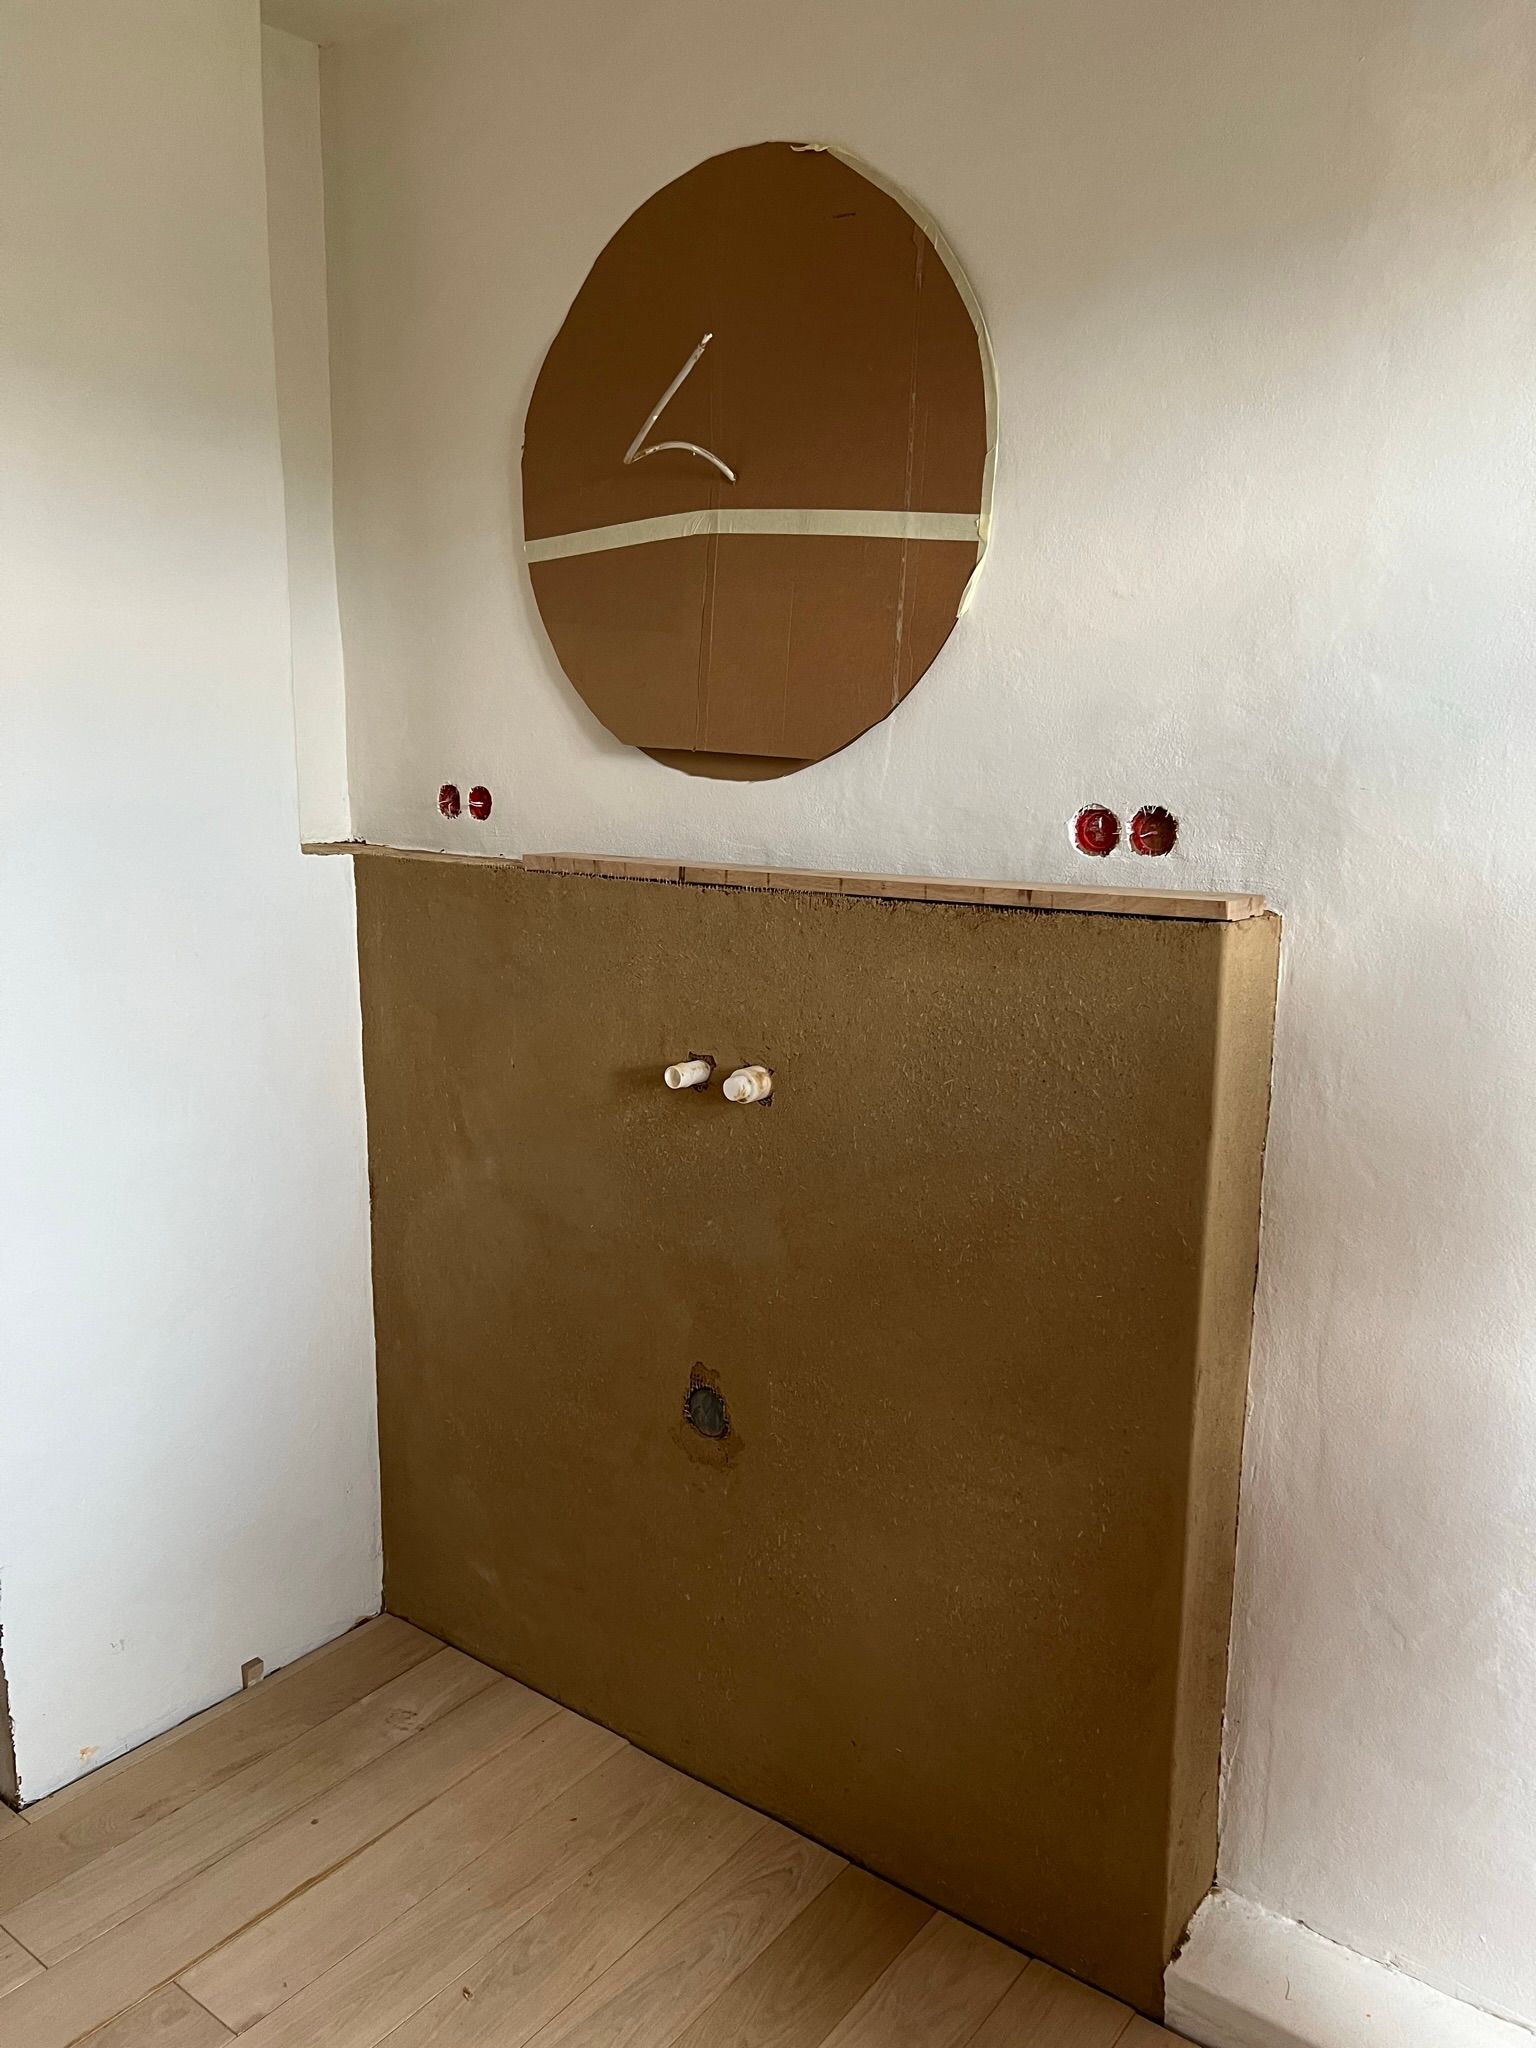
Prototype
The thing that proved to be most effective for me in those situations: building a prototype – I promise I’ll spare you another excursion into product development 😄 The first thing I’ve tried is cardboard, but it tuned out I needed something a bit more sturdy so I ended up using plywood.
The prototype approach allowed me to experiment a lot with how much overhang the wood board should have. I just left the fake wood board on for a day to gather some impressions in real life use and asked my wife for feedback.
Heaven
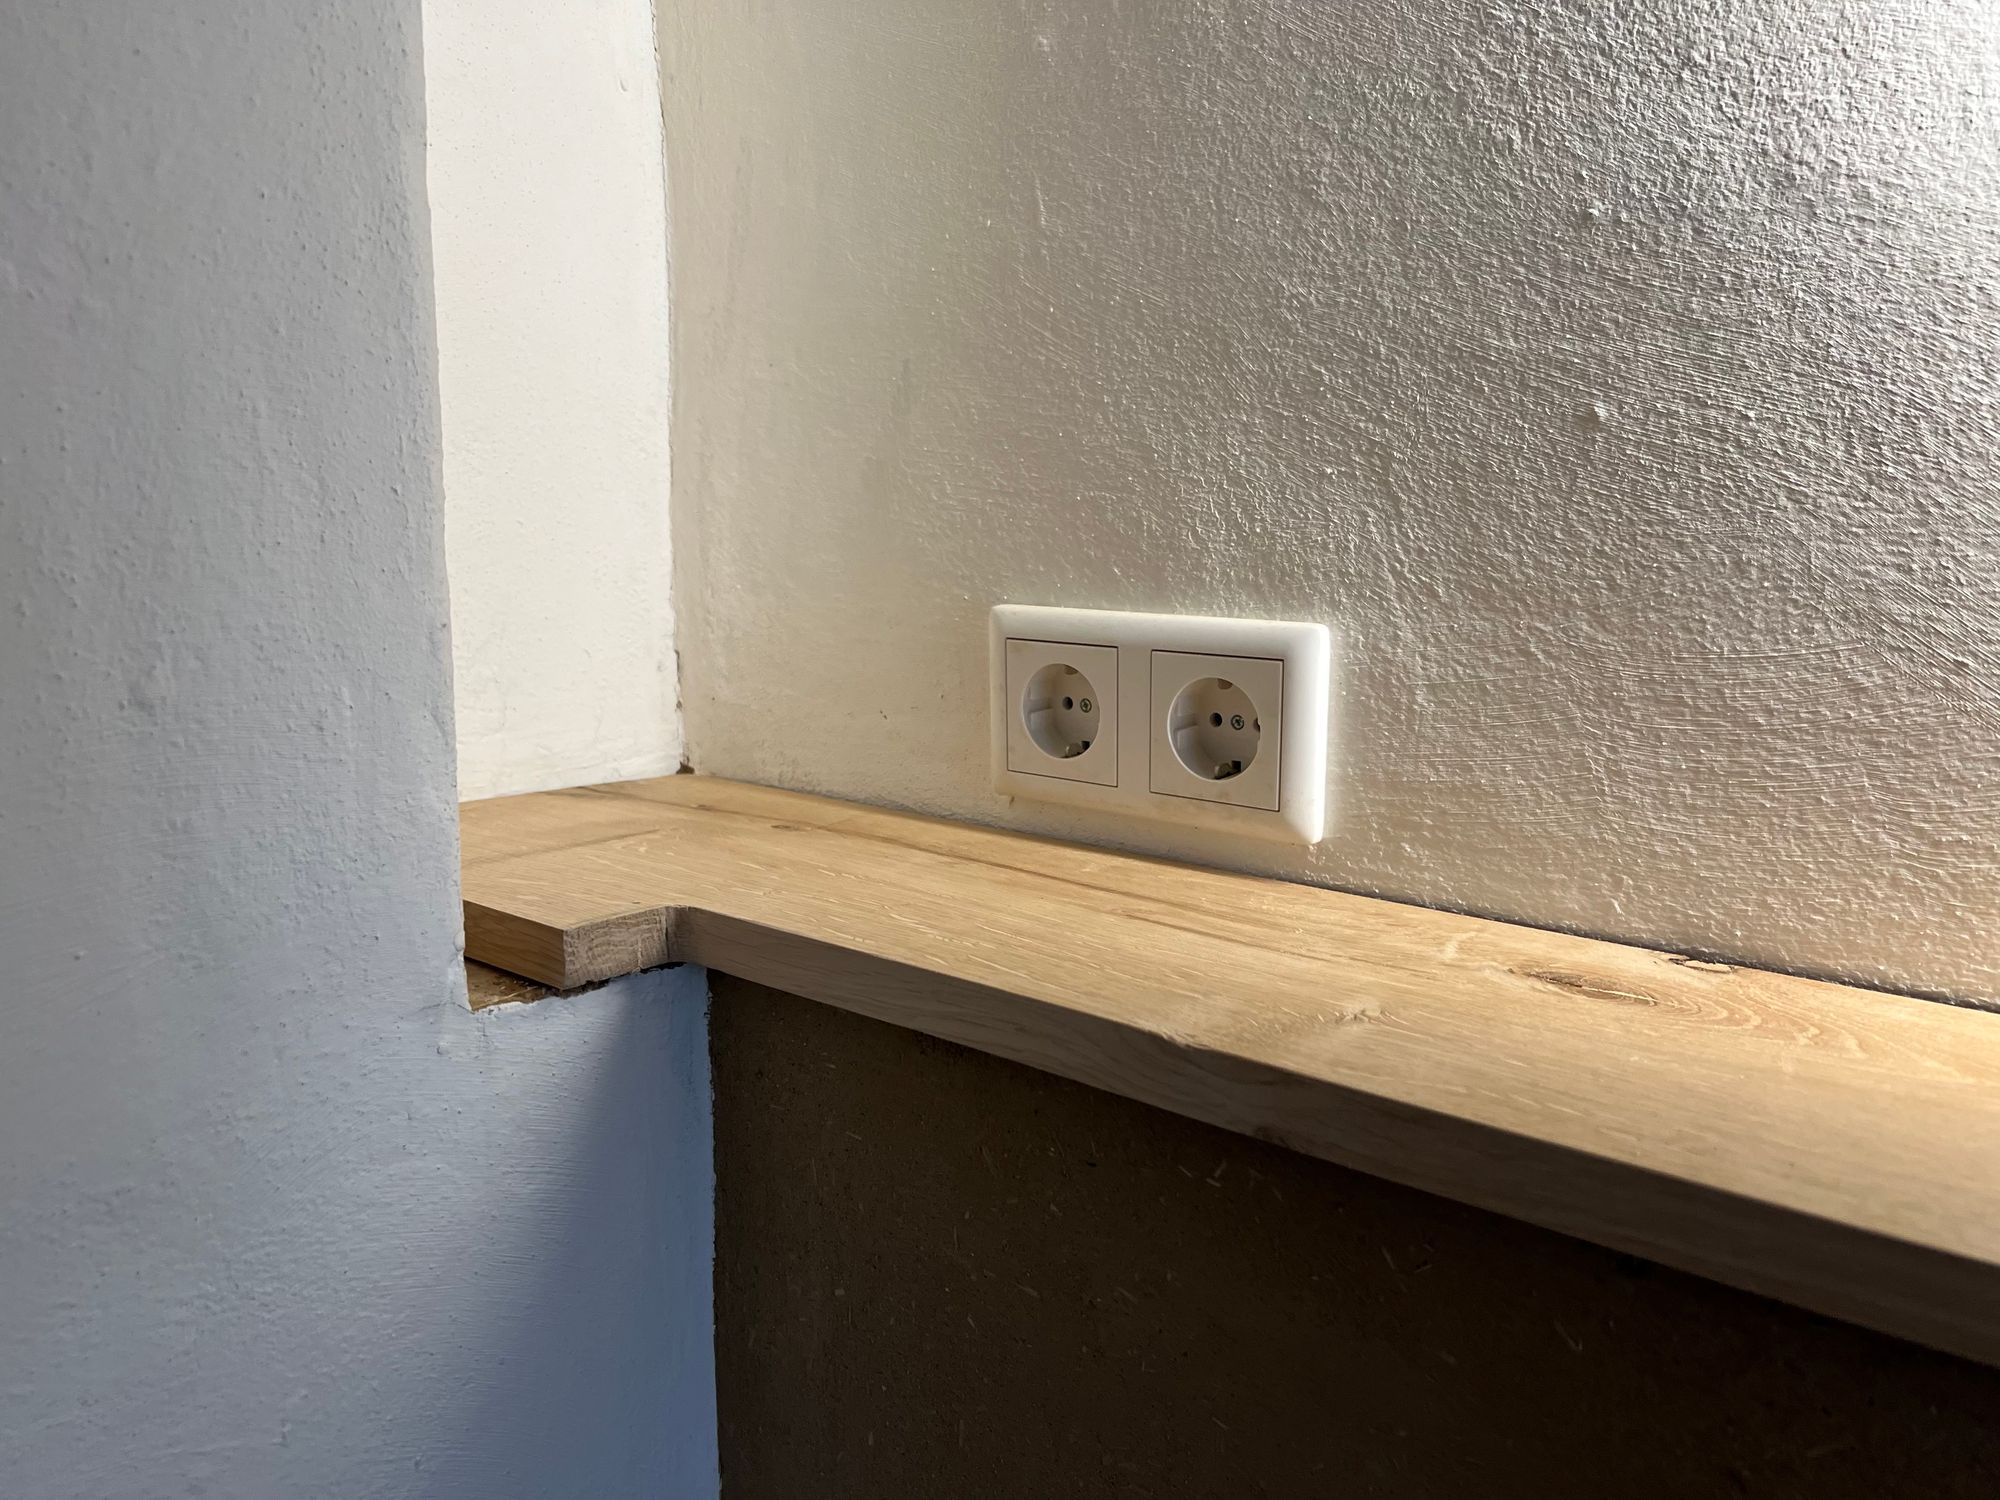
After a couple of iterations I had the confidence to build the real thing so we went to our beloved local sawmill to get a nice board of oak. I hoped they have the exact size I needed in one piece, but as the left side of the shelf area is quite deep (25cm) that wasn’t possible. The nice folks from the sawmill let us take our time to choose the nicest board and we ended up paying only 15€ (200x22x2 oak board from local forests).
Me: “I’m at the saw mill 😅 Will reply later 😄”
Coworker: “so what you’re saying is that YOU ARE IN HEAVEN!!!???”

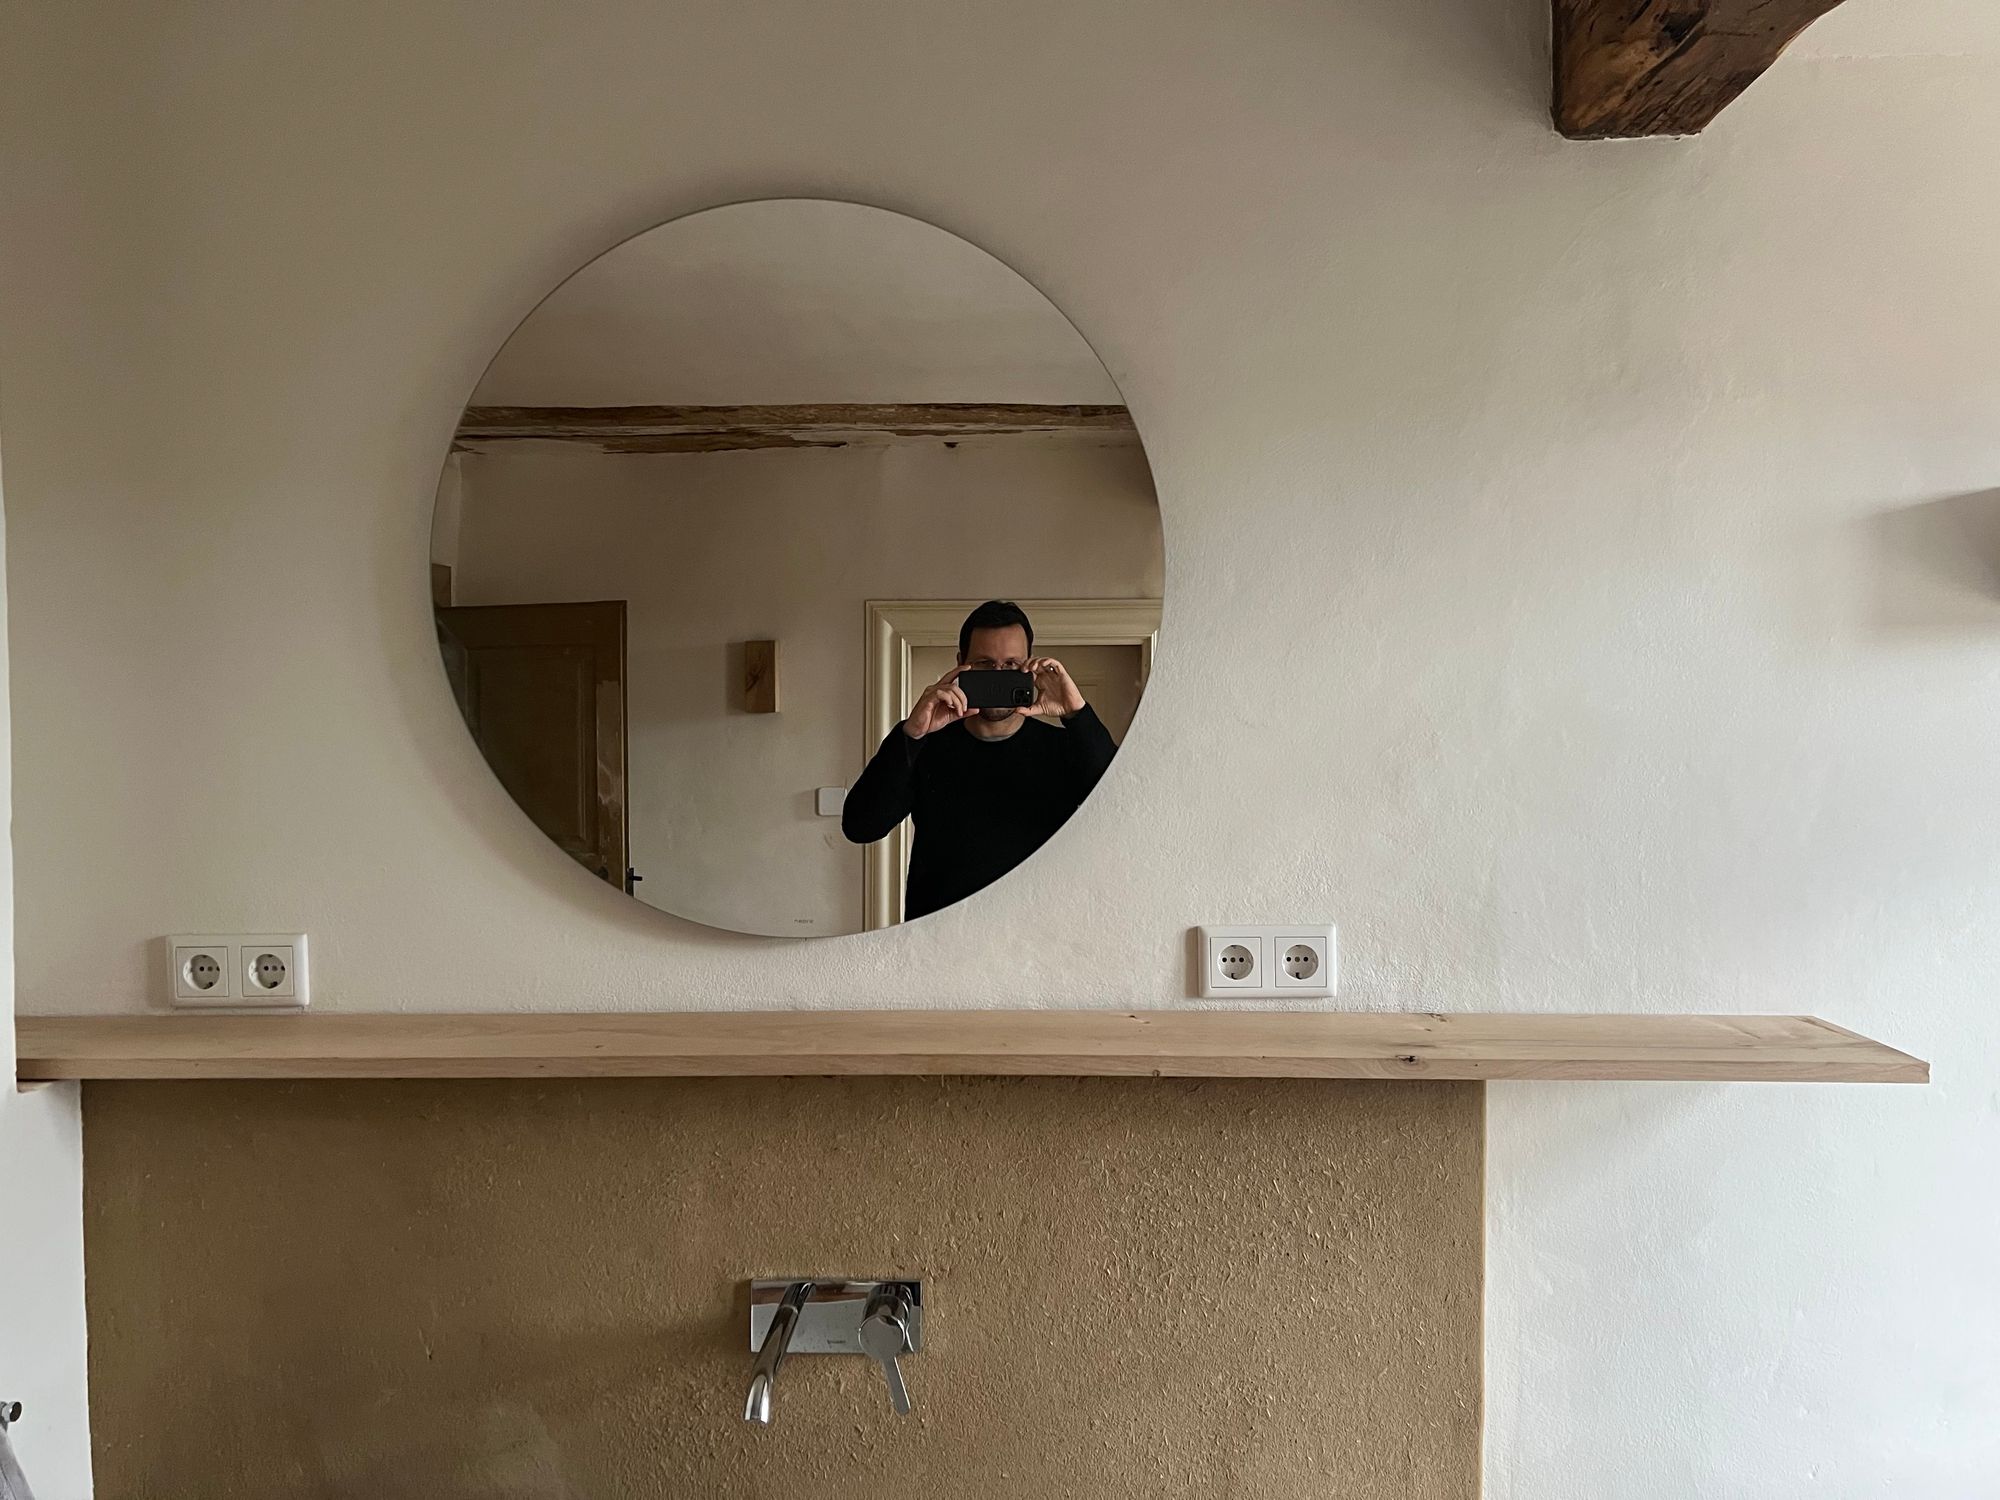
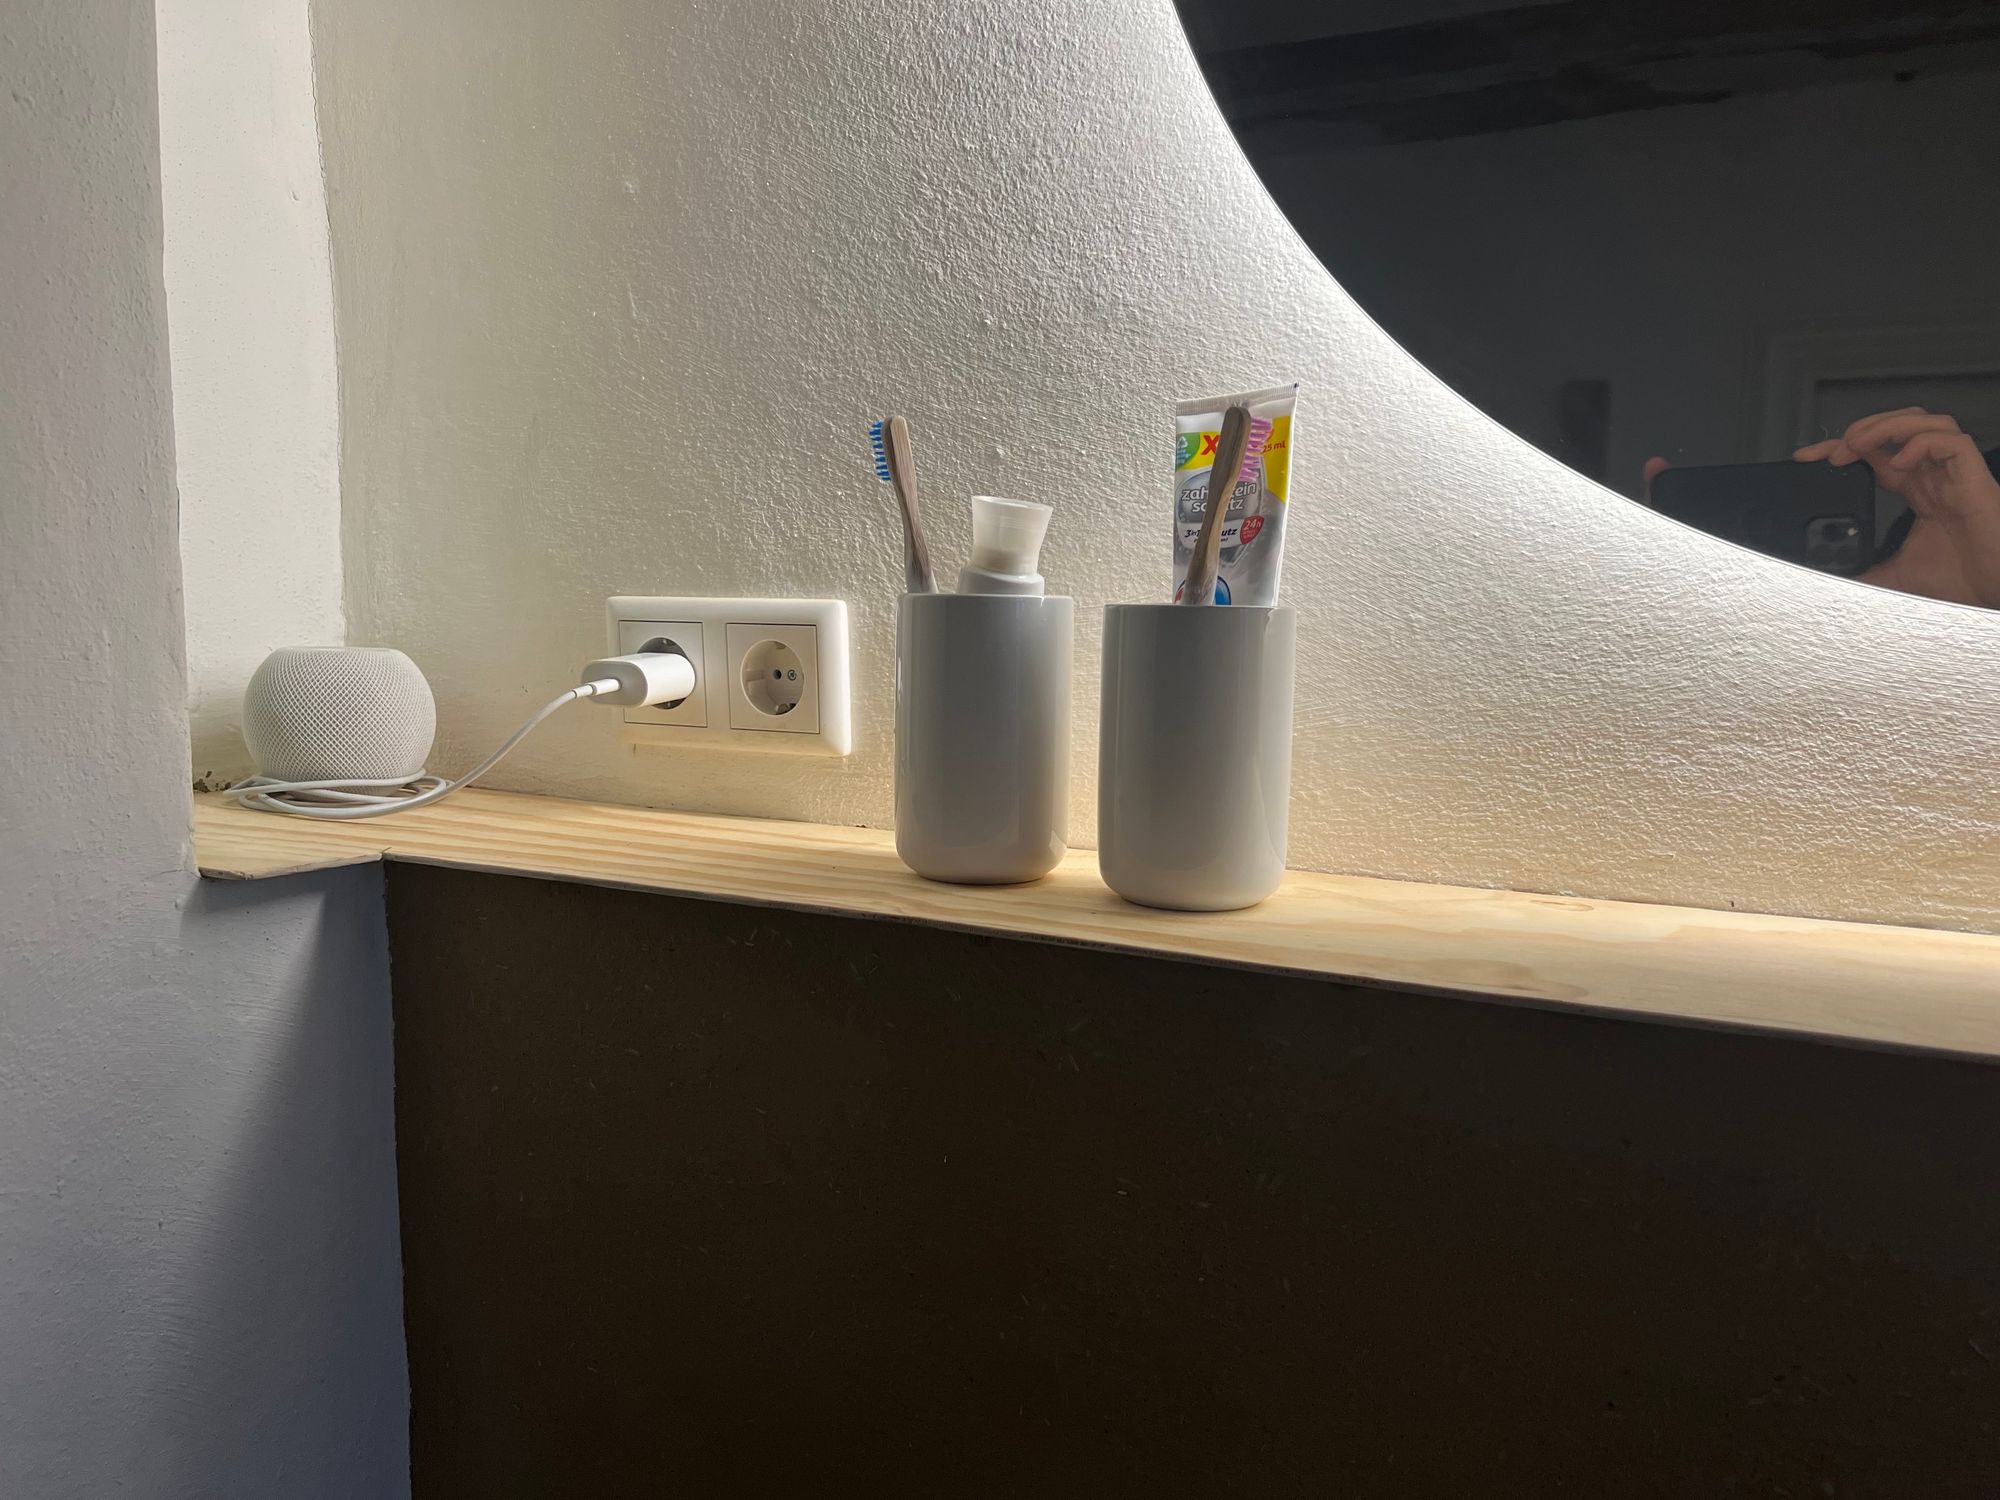
Having built the template prototype made the rest so much easier and I mostly spent my time on adding the missing 2cm on the left side and making the board look nice. As soon as the shape and edges were done I moved on to oiling the board using hard wax oil.
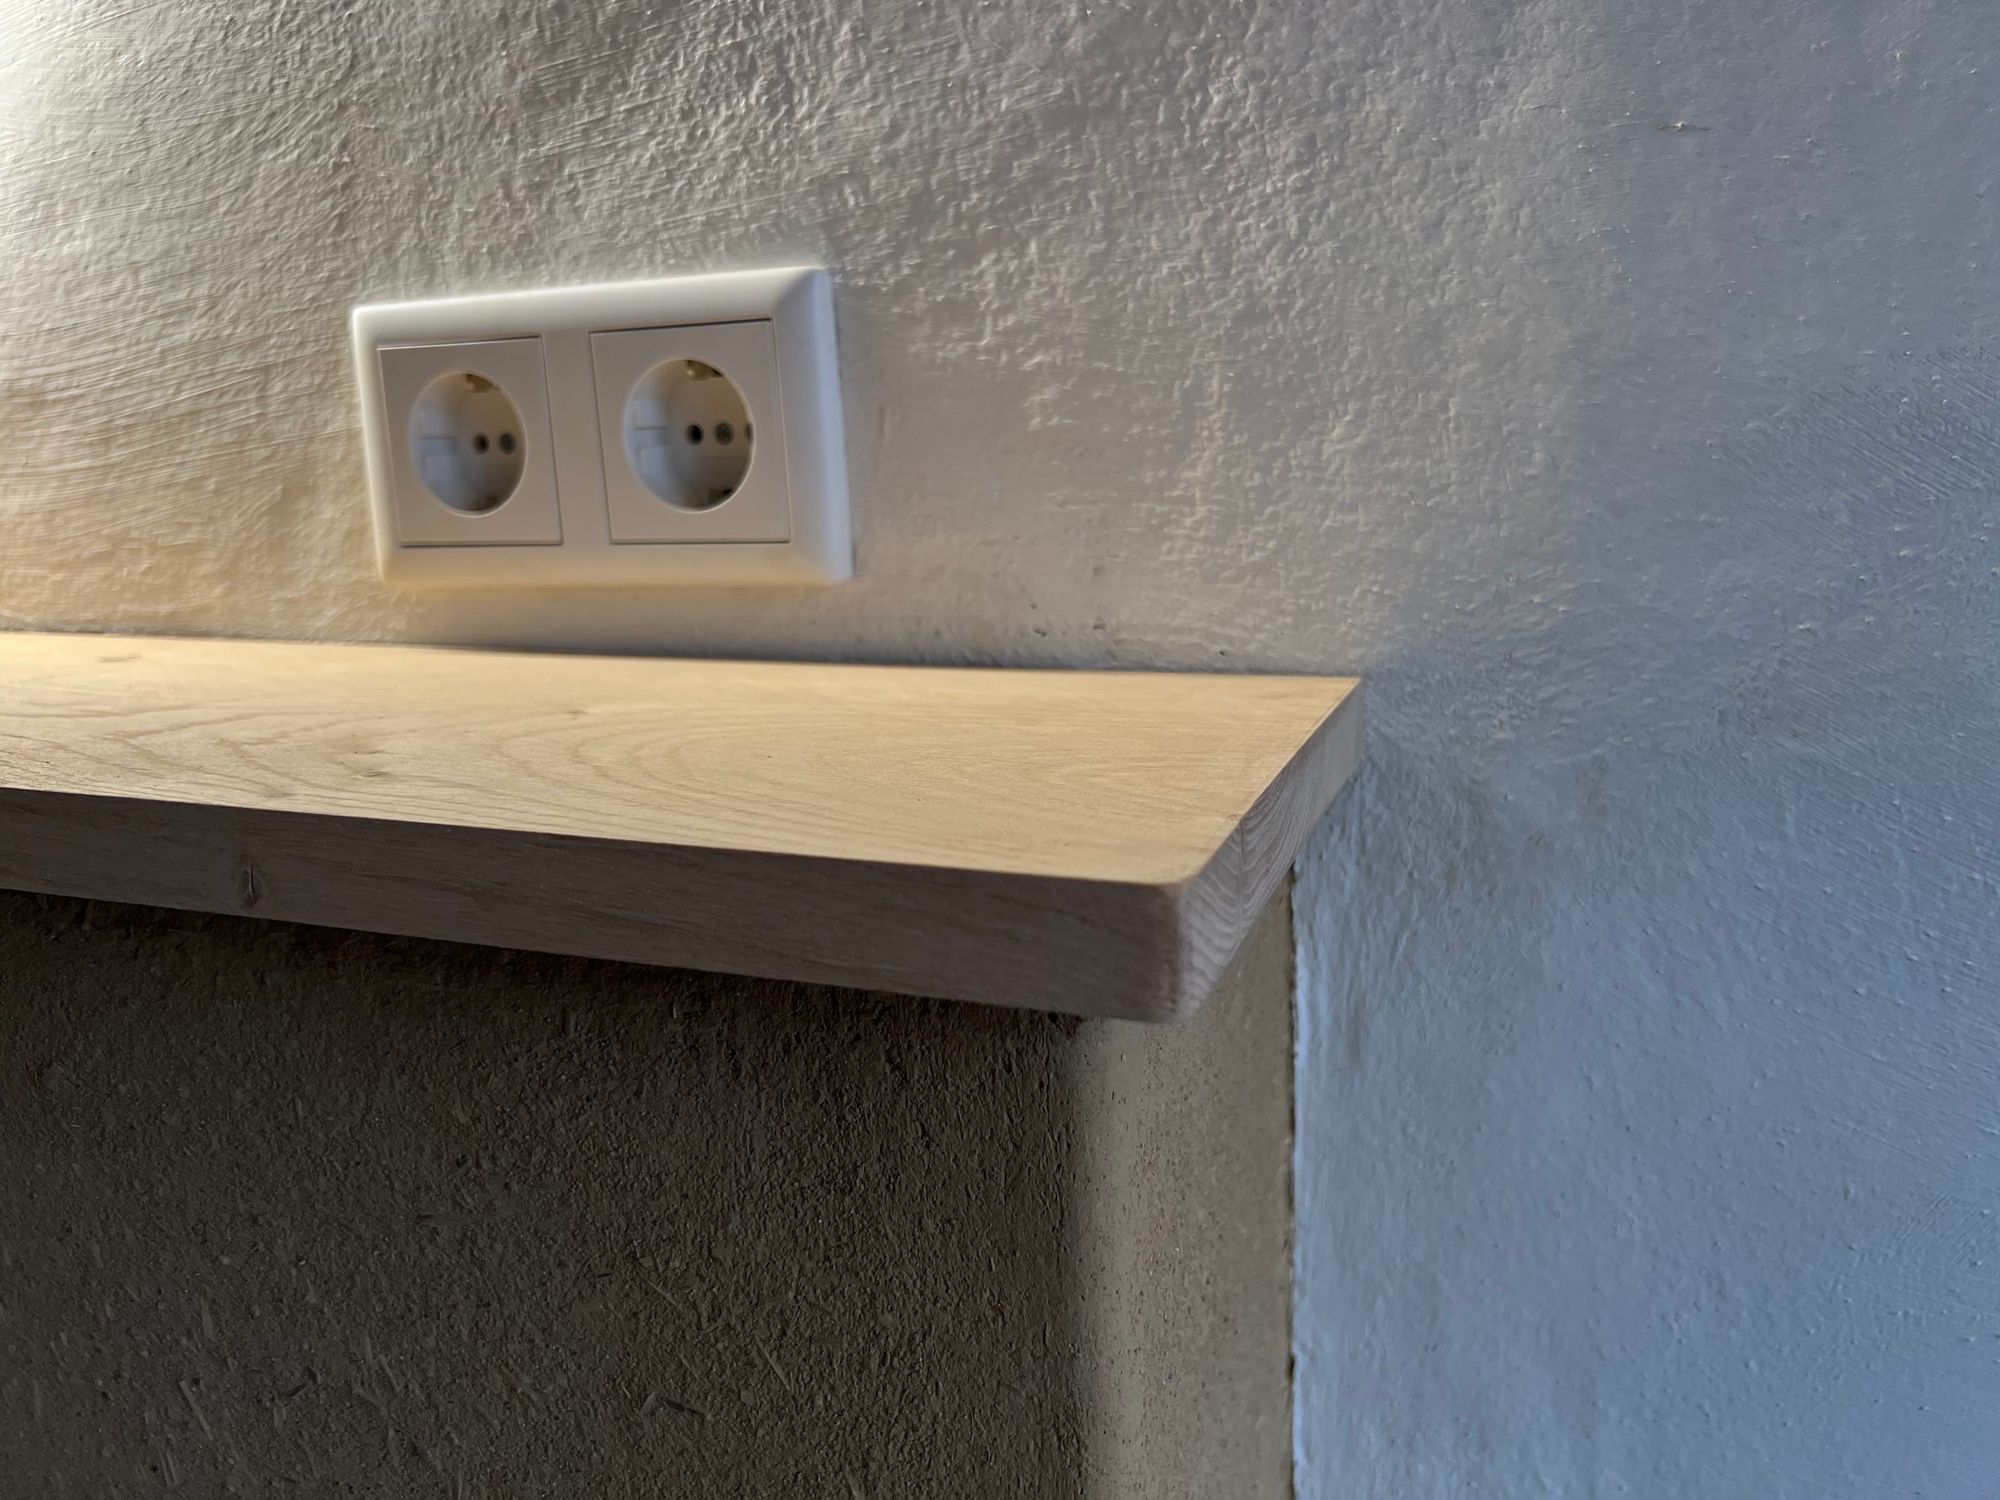
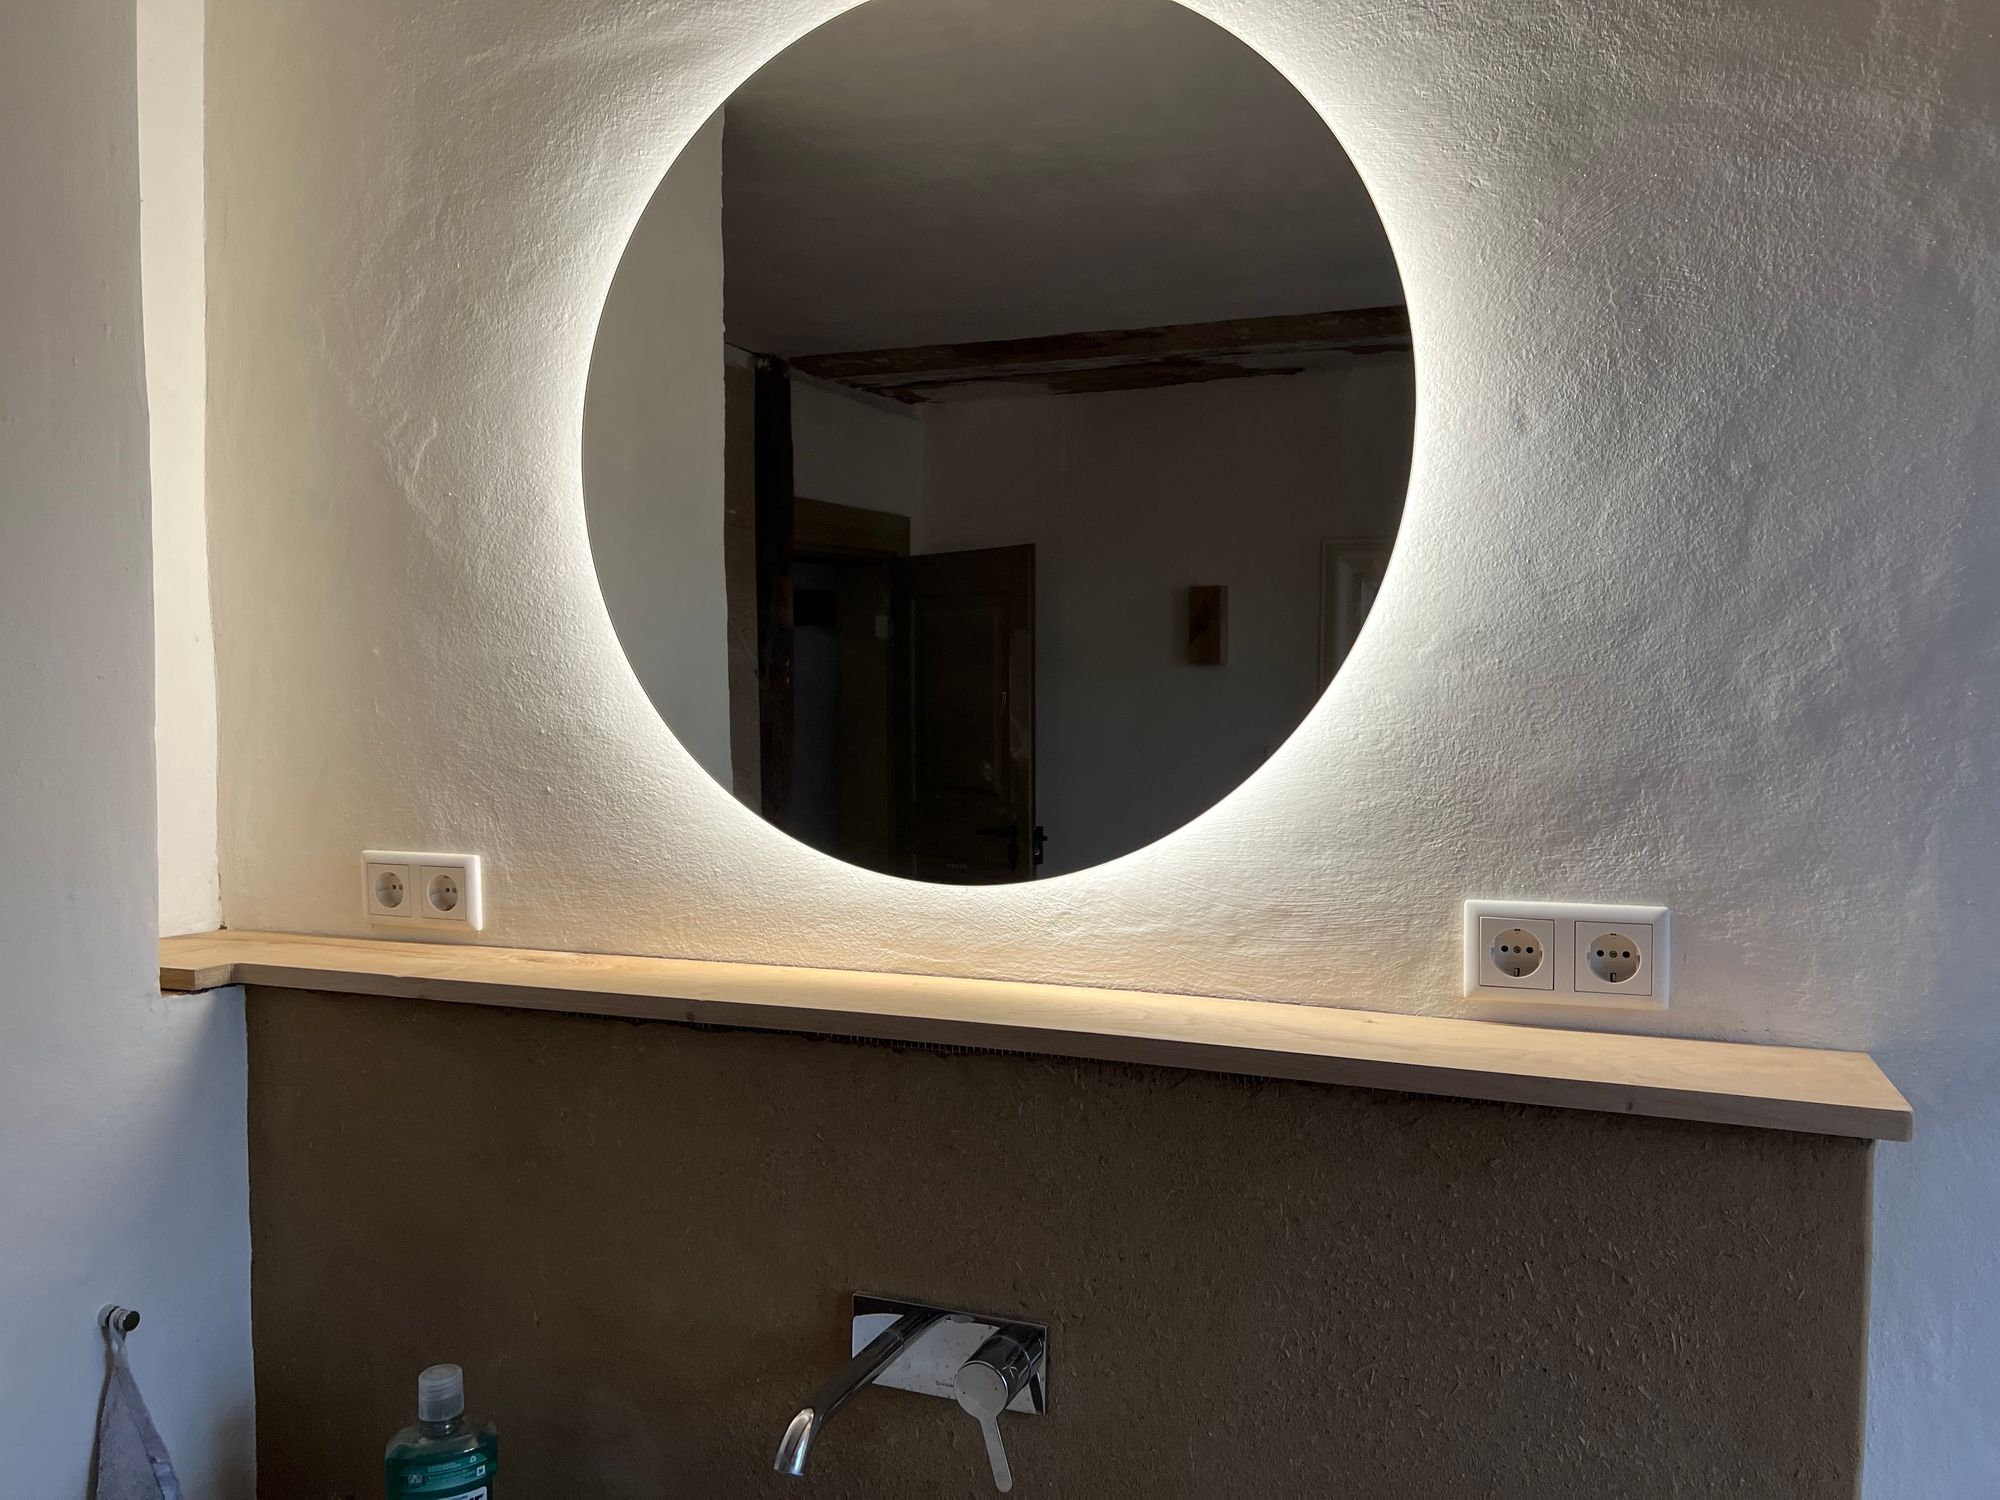
Now it was time to glue the board in place. I was a bit anxious if it would work out as the board had a bit of flex and formed a gap to the front wall installation in its center. In the end everything turned out nicely and I only needed to polish some of the details like smoothen the transition to the underlying construction (clay to the rescue).
I’m very happy with the end result as it’s exactly like I imagined it when we did the planning. It’s likely that I’m going to build additional stuff out of oak wood – it’s just so nice to work with.
I hope you enjoyed this (long) episode. I’m always happy to get feedback. You can find me on Mastodon.